

Want Shellac Nails at Home? Can’t afford to keep paying £30 a time to get your shellac done? Why not think about investing in a kit so that you can do your own Shellac or gel polish nails at home?
You do need to buy a few things for your kit so you can do it properly, but once you’ve purchased that, all you really need to spend money on are the different colours, so it’s a good investment. You can purchase everything that you need online at eBay or Amazon, at Salon Services or Sally Beauty Supply. Or you can buy a kit with it all in there to save you shopping around such as Sensationail or Red Carpet Manicure. It depends what you prefer.
Here’s what you’ll need for a classic Shellac or gel polish manicure:
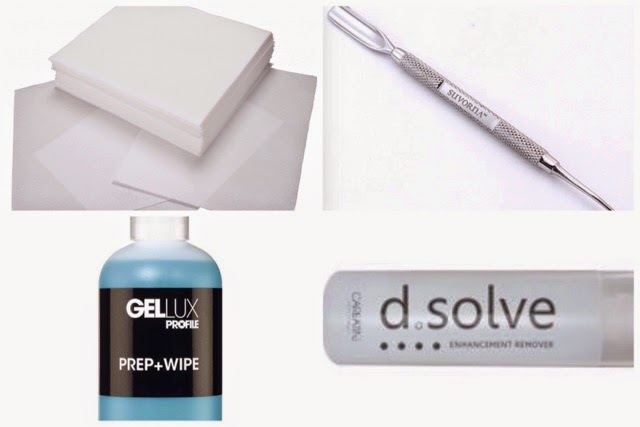
FOR PREPARATION
- Nail file
- Nail clippers or scissors
- Nail buffer
- Cuticle tool/cuticle pusher
- Nail primer/dehydrator (you can often get a prep
and wipe product which is a 2 in 1) - A towel
 |
| Glittery Red Shellac |
FOR APPLICATION
- A 36 watt UV Lamp or 12 watt LED lamp
- Shellac or Gel Polish topcoat
- Shellac or Gel Polish basecoat
- Shellac or Gel Polish colour(s)
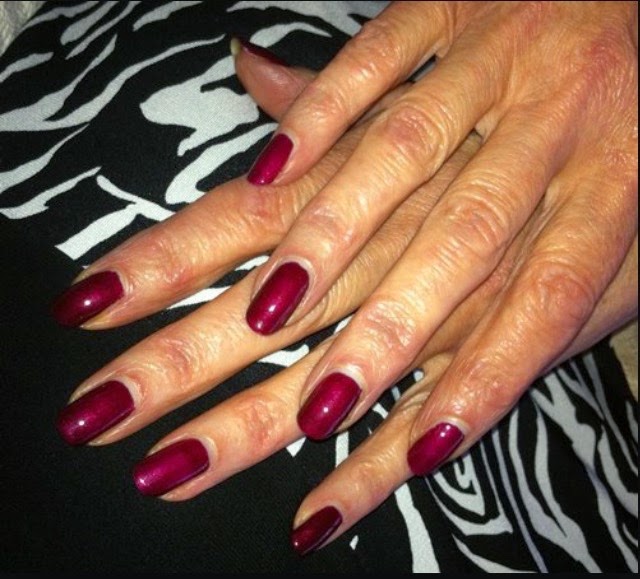 |
| Red Baroness Shellac |
FINISHING
- Gel wipe/inhibition layer removal solution
- Cuticle oil
- Lint free squares
And here’s how to give yourself that Shellac or Gel Polish manicure. The most important thing to remember is – don’t get any of the coats on your skin.
STEP ONE –PREPARE YOUR NAILS
- Wash and dry your hands
- Trim and shape your nails to your preferred shape
and length - Use your cuticle tool to gently remove cuticle from
your nail plate - For Gel Polish (not Shellac) gently buff your nail
plate just to take away the shine - Use some nail dehydrator/prep+wipe on a lint free
wipe and wipe each nail to prepare it
 |
| Shellac Dark Lava |
STEP TWO – APPLYING BASECOAT, COLOUR AND TOPCOAT
- Shake your bottles of polish before starting (Shellac and Bluesky Shellac especially)
- Wipe excess product from the brush onto the inside of the neck of the bottle before apply so it’s nice and thin
- Apply a thin layer of basecoat, as you would apply a nail varnish
- Paint polish over the tip of your fingernail to ensure long wear
- Put in the UV lamp for 2 minutes or LED lamp for 30 seconds (Gel Polish) – 10 seconds for Shellac basecoat in a UV lamp
- Repeat for the other hand
- At this point the nails will have a sticky residue. Leave this alone until the final step as it helps the next layer adhering properly
- Apply 1 thin, even coat of your coloured Shellac or Gel Polish
- Put in the UV lamp for 2 minutes or LED lamp for 30 seconds (check manufacturers guidelines for specific times for specific brands)
- Repeat on the other hand and repeat on both nails so you have done 2 colour coats. Sometimes you might need to do three if the colour still isn’t opaque depending on the brand or colour of the polish.
- Finally, apply the Shellac or Gel Polish topcoat over each nail, going over the tip to seal the colour. Make sure to avoid the skin.
- Put in the UV lamp for 2 minutes or LED lamp for 30 seconds (check manufacturers guidelines for specific times for specific brands)
- Last step, put some inhibition/gel wipe remover onto a lint free pad, rub over each nail to remove the sticky residue that remains on the nails and..voila!
- You could apply some cuticle oil at this point.
Hopefully that was easy to understand!
Where to buy the products
Cuticle Tools – http://www.moyou.co.uk/nail-art-tools/nail-tools.html
Lint free wipes – Amazon, Ebay
Nail files – Amazon or Ebay
Nail Prep and inhibition layer remover –Salon Services
Shellac kits – http://www.nyk1.com/product-category/shellac-gel-nail-kits/ or Boots or QVC